The charcoal snake method simply refers to a method of arranging your coal in a curved row alongside the wall of your grill like a snake looks. Hence the name, the charcoal snake method.
As a seasoned pitmaster, I really appreciate the fuel efficiency of the charcoal snake method, especially on my Weber Kettle 26''. When done right, the charcoal snake method will give you a consistent low temperature for hours. It’s perfect for low and slow cooking without having to replenish the briquettes.
I will show you step-by-step how to build a charcoal snake and how much fuel you will need. I will also tell you the pros and cons of this technique, and answer your most pressing questions about the charcoal snake method:

The name charcoal snake directly refers to the coal arrangement. It involves laying a ring of charcoal briquettes halfway along the perimeter of your charcoal grill.
The coals are laid out one after the other in close contact halfway along the wall of your grill. You can then light up the coal on one end of the snake and your work is done.
As the coal on the lit end burns off, it will light up the next column of briquettes and so on until all the coal is used up. This provides a slow and steady heat that lasts throughout the barbecue.
The snake method facilitates slow cooking methods that require low temperatures. This method is mostly applied when grilling or smoking.
You can throw in a few wood chunks of your favorite flavor to enhance your meat with inviting smoke scents.
This coal arrangement technique is mostly associated with Kamado-style grills and the kettle grill that feature circular insulation walls for the cooking chamber. However, by design, offset grills or smokers can work just as well as long as the coal arrangement is well-done.
You can make 2 or 3 layers depending on how long you estimate your cooking will last. Of course, the fatter the snake, the longer it will burn.
To build your charcoal snake, start by gathering the following items:
Start by placing the briquettes one after the other on the grill grate. Use the wall of the cooking chamber as your guide until you cover half of the perimeter. Use this ring of coal to add another row right next to it.
Having laid the 2 columns out, repeat the process, placing more briquettes on top of the first layer. You should have half a circle of briquettes that is 2 briquettes high and 2 briquettes wide.
For longer cooks, add more briquettes but be careful to leave sufficient room in the chamber for your meat and the water pan.
From your coal arrangement, take around ten briquettes and light them. I use a Wisauto charcoal chimney to ignite my briquettes because it saves me a lot of time.
If you don’t have one on hand, lighter fluid will also get the job done.
Using a pair of tongs to hold the lit coals, place them at the start of the snake ring. The lit coals will act as the fuse that will ignite the rest of the fuel.
If you want to add some flavor using smoking wood, place them a few inches apart on top of the snake. You can use wood chunks or wood chips.

It’s essential to use a water pan. It serves to regulate the internal temperature of the cooking chamber and prevent hot spots. This, in turn, ensures that your barbecue is evenly done. Set it up using these simple steps:
Place your water pan in the middle of the grill right next to your charcoal snake.
Make sure that the pan is not directly touching the coal so that it won’t get scorched by the lit briquettes.
Fill three-quarters of the pan with hot water and let it sit there through the cooking. I use hot water so that my weber kettle doesn’t waste energy heating it up.
Place the marinated meat on the cooking grate, over the water pan, and not over the lit briquettes. Remember, we are going for the indirect heat.
With your weber kettle grill set up and ready to go, let’s talk about temperature control. Aside from using a water pan, you will have to work the vents on your grill.
Our target temp for our low and slow cook should be between 225-250 degrees Fahrenheit. Without harsh weather conditions, we can hold this temperature easily without further adjustments.
Start with the intake and vents open. When the temp gets to 200, slightly close the intake vent to reduce the amount of oxygen being drawn in. The briquettes will start burning slower, stabilizing the temp within the cooking chamber.
If the weather changes are drastic, continue managing the temperature by tweaking the vent. If it gets too hot, reduce the air getting in by closing the vent. If the temperature starts to dip, the fuel needs more oxygen, open the vent.
That said, don’t get too confident with the vents. After every adjustment, give the grill enough time to get to the desired temperature.
Keep the exhaust vent at least slightly open to get rid of the combustion gases that will otherwise smother the fire.
If you still feel that the heat is too much, grab your aluminum foil and tent the meat. This should keep your meat from cooking too fast.
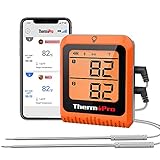
For more accuracy, I use a ThermoPro meat thermometer to keep an eye on the cooking temperature.
The unlit briquettes won’t impart any taste to your barbecue.
If this is a concern for you, go for briquettes that don’t contain any chemical solvents added to the coals during manufacturing to make them easier to ignite.
Additionally, avoid using lighter fluid to get your coal started, and opt for a charcoal chimney instead.
For those with extremely sensitive palettes, let your briquettes smolder for around 30-40 minutes before placing your meat on the grill. This should rid your food of any subtle unwanted scent or taste.

The best coal for the snake method is briquettes. Here’s why:
Briquettes burn slowly, making them the obvious option for long cooks. Lump charcoal will burn too fast defeating the purpose of the snake method.
Briquettes have a uniform shape that ensures the fire burns more evenly, giving you more control over the cooking temperature. Lump charcoal comes in irregular shapes and sizes giving you a fire that is harder to control.
The regular size of the briquettes makes them much easier to stack compared to lump charcoal.
If you’re loyal to charcoal but still want to use the snake coal arrangement, go for charcoal briquettes since they will guarantee the same results. If you’re not sure about the brand to go for, Olivette or B & B charcoal briquettes.
The amount of fuel you need depends on several factors. They include:
Weather conditions largely affect your fire, especially when it comes to outdoor cooking. Strong wind adds to the amount of oxygen that gets to your fuel which in turn forces you to use more briquettes.
If it’s windy, leave just a little space open on your bottom vent instead of moving the party inside.
The thickness of your grill wall directly affects the insulation. Different grills have different walls and this is a major feature you must consider when getting one.
The thicker the walls on your grill, the better the insulation. It will keep heat and smoke inside the chamber cutting down on cooking time and fuel use per cook.
If the walls of your grill are thin, a lot of heat is lost to the surroundings, which means longer cooking periods and more fuel with every barbecue session.
Too much ash in the chamber reduces the amount of oxygen present to keep the coals going.
Kamado-style grills have a small space to collect ash. It’s best not to use lump charcoal fuel for long cooks with such grills because the ash will choke the fire and put it out.
The snake you build influences how long your fire will last. If you’re smoking a large cut of meat like a brisket or pork butt, build a bigger snake. For smaller cuts, a smaller snake will work just fine.
However, I recommend always going with a long charcoal snake since the fire only burns through a few briquettes at a time as it moves along the fuse. When your food is cooked, you can always pick out the unburnt briquettes. No fuel will go to waste.
In my opinion, it’s better than having to add briquettes to your kettle grill since you have to first remove everything, meat included. This is dangerous, messy, and tiresome.
Leaving the vents open the whole time will consume more briquettes. Use the vents on a necessity basis when you need to adjust the temperature in the chamber.
For more efficiency, use a grill thermometer. This way, you can be sure when your grill needs an adjustment instead of speculating.

So what are the advantages of using the charcoal snake method? Are there any disadvantages? Let’s find out:
I like the charcoal snake method mainly because of its simplicity. It is easy enough for a novice to nail and reliable enough for barbecue warriors worldwide.
The charcoal snake method is hands-off and forgiving. It doesn’t demand your constant presence. This method works better if you keep your hands away from the grill lid. Each time you open your grill, hot air escapes requiring the grill to come up to the desired temperature again.
The charcoal snake method works best with briquettes which are cheaper than lump charcoal, especially for long cooks.
The snake method makes a grill versatile because it can double up as a smoker when needed. It turns my Weber Kettle grill into a charcoal smoker on demand.
The charcoal snake is a particular arrangement of coals. For best results, lay the coal as instructed. It can be a bit time-consuming compared to other coal arrangement methods.
It’s not suitable for searing because it facilitates low and slow cooking. This means that you should aim to keep the temperature at around 250. Searing calls for high temperatures ranging between 375-450
It’s not suitable for large pieces in a standard-size grill because that would require you to build a large snake that will take up more space on the grill.
It is tedious and dangerous to add briquettes if they run out.
Absolutely not. The pellet grill is specifically designed for pellet use. Using charcoal could damage your grill and void your warranty. Moreover, the burning charcoal in your pellet grill could cause a build-up of carbon monoxide that can get fixed on your barbecue.
If you have to use charcoal on your pellet grill, there is a wide array of charcoal pellets to choose from. I use Pit Boss Charcoal Blend pellets whenever I am smoking meat for the company.
The burn time for your charcoal snake depends largely on the size of briquettes you use and how many you use to build your snake.
On average, when smoking on my Weber kettle, I build the snake using roughly 55 briquettes which yield a fire that lasts between 9-12 hours.
The snake method works best with briquettes. If you prefer charcoal, use charcoal briquettes.